
7 Practical Vendor Table Display Ideas for Pop-Up Shops
- Author
- PSBI Press
- Published
- Updated
- Updated
- Reading time
- 6 min read
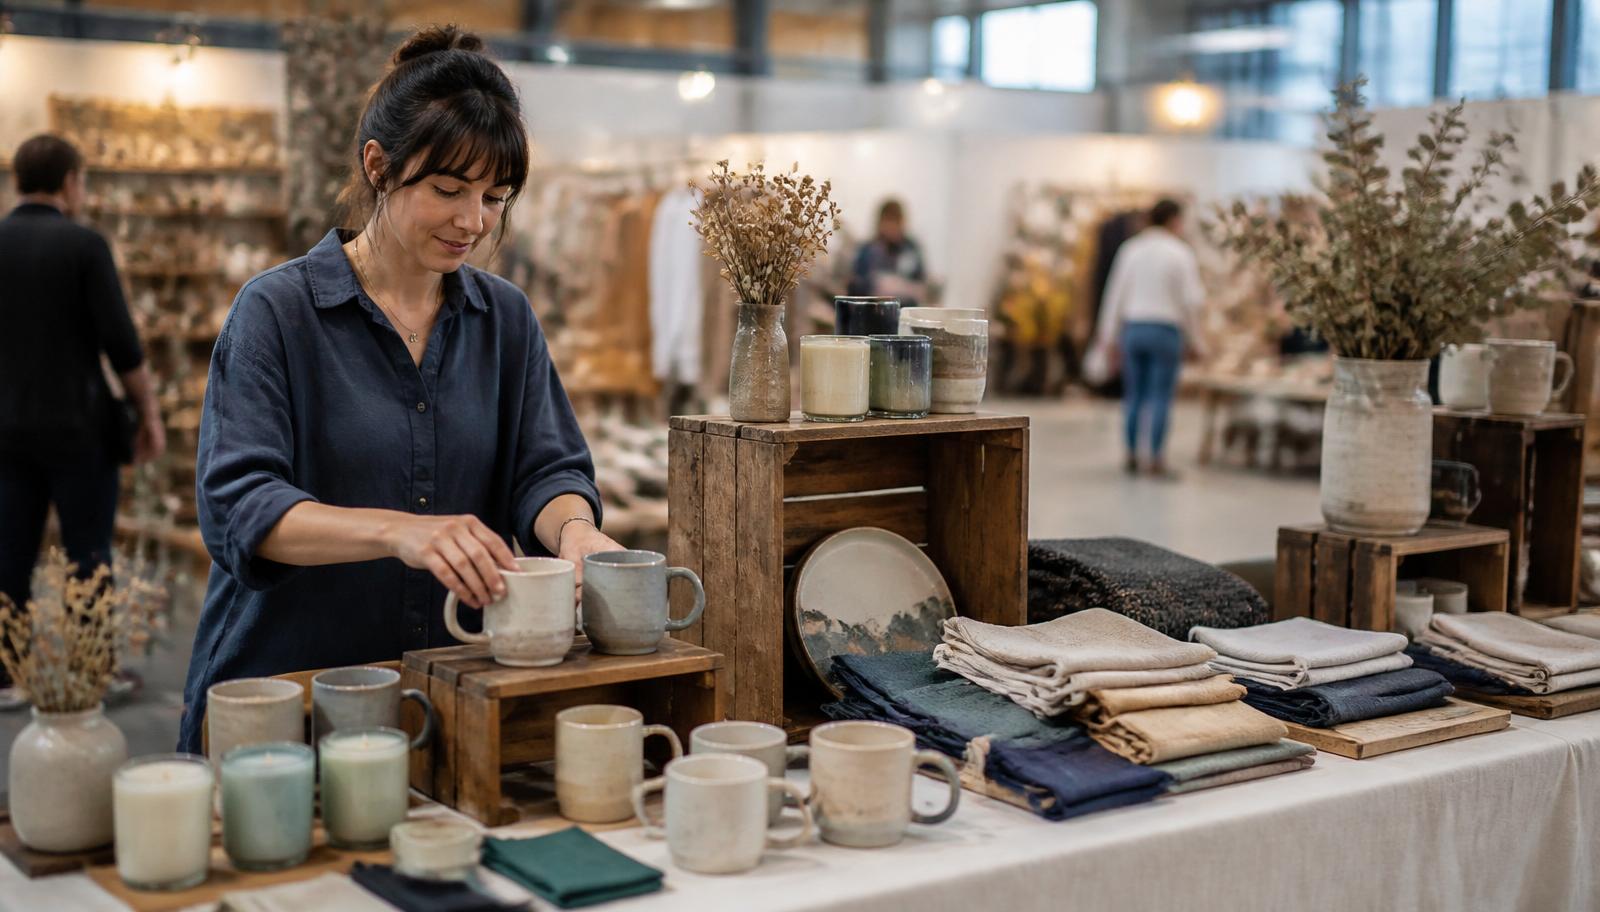
At a busy pop-up market, customers may decide quickly whether to approach a vendor’s table.
The quality of your products matters, but their presentation also affects whether customers notice them, understand what you sell, and feel comfortable stopping to browse.
A professional vendor display does not require an expensive custom booth. Thoughtful product placement, clear pricing, visible branding, and an organized setup can make a small table look polished and inviting.
Here are seven practical vendor table display ideas that can help improve the customer experience at your next pop-up shop, craft market, festival, or temporary retail event.
1. Build the display around a clear theme
Your table should feel like one connected presentation instead of a collection of unrelated products.
Begin with a simple visual theme that reflects your brand and merchandise. The theme might be based on:
- your brand colors
- the type of products you sell
- the season
- the event
- a particular customer lifestyle
- a featured product collection
For example, a handmade soap business might use soft colors, natural textures, and small botanical accents. A stationery business might use bright colors, coordinated trays, and framed product examples.
Choose a limited color palette and repeat it through your table covering, signs, packaging, display pieces, and small decorations.
Your products should remain the main focus. Decorations should support the merchandise rather than compete with it.
2. Use height to improve product visibility
When every product sits flat at the same level, items near the back of the table can disappear from view.
Create multiple display levels by using:
- tabletop risers
- sturdy boxes covered with fabric
- wooden crates
- shelves
- display stands
- baskets
- tiered trays
- product racks
Place taller items toward the back and shorter products toward the front. Elevated sections can highlight bestsellers, new products, bundles, or premium items.
Varying the height helps customers see more of the display before they reach the table.
Make sure every display piece is stable. Avoid fragile or excessively tall arrangements that could fall when customers touch products or when wind affects an outdoor booth.
3. Offer samples or demonstrations when appropriate
Samples can help customers understand a product before making a purchase.
Depending on the business, a sample or demonstration might include:
- a small food or beverage taste
- a skincare tester
- a fragrance sample
- a product demonstration
- a material or texture sample
- a short before-and-after example
Only offer food, beverage, cosmetic, or personal-care samples when permitted by the event organizer and applicable health and safety requirements.
Clearly label samples and keep the sampling area clean and separate from products customers will purchase.
The sample should support the product experience without blocking the table or creating confusion.
4. Create a simple interactive experience
Customers are more likely to remember a booth when they can participate in the experience.
Depending on the products, an interactive element might allow customers to:
- try on an accessory
- compare product options
- mix and match items
- create a personalized combination
- watch a brief demonstration
- scan a QR code
- answer a short question
- view examples of how the product is used
For example, a jewelry vendor could let customers combine different pieces. A skincare vendor could demonstrate the correct way to use a product. A stationery business could allow customers to compare paper styles or product sets.
The interaction should remain simple and easy to manage. It should help customers understand the product rather than become an unrelated attraction.
5. Display products creatively but clearly
Creative display materials can help distinguish your booth from nearby vendors.
Useful display pieces might include:
- wooden crates
- baskets
- framed displays
- small shelves
- decorative trays
- repurposed containers
- vintage suitcases
- recycled cardboard structures
- fabric-covered boxes
Select materials that fit the brand and products. Rustic wooden crates may work well for natural goods, while sleek acrylic stands may suit jewelry, technology accessories, or contemporary products.
Creativity should not make the products difficult to reach or understand.
Customers should be able to identify what is for sale, see the pricing, and pick up an item without disturbing the entire arrangement.
6. Add personal touches that explain the brand
A pop-up shop gives customers the opportunity to meet the person behind the business.
Use the display to communicate who you are, what inspired the company, and what makes the products distinctive.
Personal touches might include:
- a short brand-story sign
- photographs showing how the product is made
- a card explaining the inspiration behind a collection
- thoughtful packaging
- handwritten thank-you notes
- business cards
- a QR code leading to your website or social channels
- a small sign identifying handmade or locally produced merchandise
- a brief explanation of the problem the product solves
Keep the story concise. Customers should be able to understand it without reading a large wall of text.
The vendor is also part of the presentation. Remain attentive, approachable, and prepared to explain the products without pressuring customers.
7. Keep the table clean and organized
A crowded table can make strong products appear less valuable.
Avoid placing all available inventory on the tabletop. Display a representative selection and keep additional stock organized beneath the table or in an approved storage area.
Keep the following items out of the customer-facing display when possible:
- shipping boxes
- personal bags
- food and drinks
- loose cables
- packaging supplies
- extra inventory containers
- operational notes
- unused payment equipment
Use clear signs for product names, prices, sizes, bundles, and accepted payment methods.
Create enough space for customers to pick up an item and return it without disturbing the entire display.
Check the table throughout the event. Refill empty sections, straighten products, remove trash, and clean surfaces when needed.
Make prices and product information easy to understand
Customers should not have to ask the price of every product.
Use readable signs that explain:
- product names
- prices
- sizes or quantities
- available options
- bundle offers
- accepted payment methods
- important product benefits
Keep the wording brief and large enough to read from a comfortable distance.
Consistent signs and price cards usually appear more professional than many unrelated handwritten notes.
Clear information helps customers make decisions with less confusion and may reduce hesitation or buyer’s remorse.
Feature bestsellers and related product groups
Do not give every product equal visual priority.
Choose a few products to feature prominently, including:
- a bestseller
- a new release
- a limited-edition product
- a high-margin item
- a gift set
- a product that represents the brand well
Place featured products near eye level or toward the center of the display.
Group related products so customers understand how they connect. Examples include:
- skincare products organized by routine
- accessories grouped by style
- books grouped by subject
- foods grouped by flavor
- gift items grouped by occasion
- products bundled around a customer need
Useful product groupings can also encourage add-on purchases and give you more opportunities for connecting with customers at a pop-up event.
Vendor table setup checklist
Before the event, confirm that you have:
- selected a clear visual theme
- chosen a coordinated color palette
- prepared a clean table covering
- tested all risers, shelves, and display pieces
- created clear price and product signs
- selected the products that will receive the most attention
- grouped related products together
- prepared any samples or demonstrations
- confirmed that samples are permitted
- created a place to store additional inventory
- organized bags, packaging, and payment equipment
- prepared business cards or QR codes
- checked the booth dimensions and event rules
- photographed the completed setup
- packed basic cleaning and repair supplies
Common vendor-display mistakes
Displaying too much inventory
More products do not always create more sales. Too much inventory can make it difficult for customers to focus.
Hiding prices
Some customers will walk away rather than ask how much an item costs.
Using decorations that overpower the merchandise
The display should highlight what you sell, not become a decoration exhibit.
Creating unstable display levels
Tall or poorly secured displays may block products or create a safety issue.
Ignoring the view from a distance
Step several feet away and examine the booth from the customer’s perspective. The brand and primary products should still be understandable.
Allowing the table to become disorganized
Even a strong setup loses effectiveness when products are misplaced, empty areas remain unfilled, or operational materials become visible.
Test the display before event day
Set up the complete table at home before attending the event.
Use the actual table dimensions whenever possible and photograph the setup from:
- directly in front
- several feet away
- the left side
- the right side
- the customer’s eye level
Ask whether a first-time customer could quickly answer:
- What does this business sell?
- Which products are being featured?
- How much do the products cost?
- How can a purchase be completed?
- What makes this business different?
Use the answers to simplify and improve the presentation.
Practice the decisions behind the display
A professional vendor table may attract attention, but the display is only one part of operating a successful pop-up business.
Vendors must also make decisions involving inventory, product costs, pricing, booth fees, marketing, customer traffic, conversion, and unsold merchandise.
The Popup Shop Business Simulator helps aspiring entrepreneurs practice these decisions before risking real money. For additional guidance on preparing and operating a vendor business, see the Popup Your Startup Business book on the Books page.
Tags
Practice With the Business Simulator
Try booth fees, pricing, and inventory decisions in a safe environment.
Learn about the simulatorExplore the Popup Shop Business Books
Practical entrepreneurship books for founders, side hustlers, and students.
Browse the book seriesJoin the Simulator Pilot
Be among the first individuals or programs to test the simulator.
Join the pilotRelated reading: the Popup Your Startup Business (opens Amazon in a new tab) book walks through evaluating and preparing a first launch, including cost and pricing basics.